Tag: dart

  • Flutter Rows & Columns

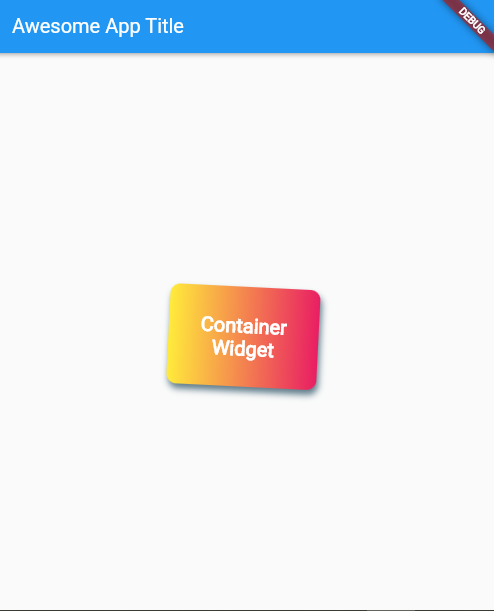
    Widgets play a key role in flutter layout where everything is a widget. Text and images are widgets but something you don’t see in a Flutter app is also widgets e.g, rows and columns, etc. Text and images are visible widgets whereas rows and columns are layout or invisible widgets.

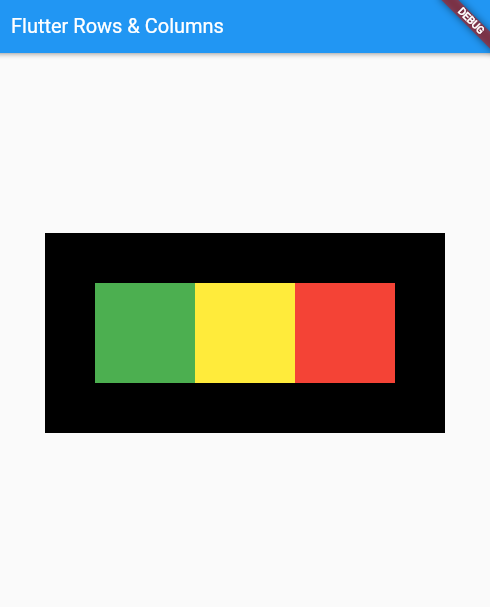
    Row Widget will have its children stacked in horizontal order.

    Column Widget will have its children stacked in vertical order.

    To make our code easy to read and understand, we’ll create a new widget/file for the home argument of the MaterialApp() widget.

    //File: main.dart
    import 'package:flutter/material.dart';
    import 'package:flutter_rows_columns/home.dart';
    
    void main() => runApp(const HomePage());
    
    class HomePage extends StatelessWidget {
      const HomePage({Key? key}) : super(key: key);
    
      @override
      Widget build(BuildContext context) {
        return const MaterialApp(title: "Flutter Rows & Columns", home: Home());
      }
    }
    //File: home.dart
    import 'package:flutter/material.dart';
    
    class Home extends StatelessWidget {
      const Home({super.key});
    
      @override
      Widget build(BuildContext context) {
        return Scaffold(
          appBar: AppBar(
            title: const Text("Flutter Rows & Columns"),
          ),
          body: Padding(
            padding: const EdgeInsets.all(8.0),
            child: Align(
              alignment: Alignment.center,
              child: Container(
                color: Colors.black,
                //width: MediaQuery.of(context).size.width,
                //height: MediaQuery.of(context).size.height,
                width: 200,
                height: 400,
                child: Padding(
                  padding: const EdgeInsets.all(8.0),
                  child: Column(
                    mainAxisAlignment: MainAxisAlignment.center,
                    crossAxisAlignment: CrossAxisAlignment.center,
                    children: [
                      Container(
                        padding: const EdgeInsets.all(8.0),
                        width: 100,
                        height: 100,
                        color: Colors.green,
                      ),
                      Container(
                        padding: const EdgeInsets.all(8.0),
                        width: 100,
                        height: 100,
                        color: Colors.yellow,
                      ),
                      Container(
                        padding: const EdgeInsets.all(8.0),
                        width: 100,
                        height: 100,
                        color: Colors.red,
                      ),
                    ],
                  ),
                ),
              ),
            ),
          ),
        );
      }
    }
    
    Flutter Column Widget

    Let’s change the width and height of the main container widget and use Row Widget instead of Column widget.

    width: 400,
    height: 200,
    Flutter Row Widget
  • Flutter Container Widget

    Do you have a widget that needs

    • some background style, maybe a background color
    • shape
    • or some size constraints?

    Try wrapping it in a Container Widget. It helps you compose, decorate and position child widgets.

    Color

    If you wrap your widget in a container widget without any other parameters, you won’t notice any difference in appearance but if you add the color parameter, your child widget will get a background color.

    Container(
       child: Text('Container Widget'),
       color: Colors.blue
    );

    Without anything else, the container sizes itself to its child.

    Container Widget Color

    Padding

    Use the container’s padding property to add empty space between the child widget and the container boundary.

    Container(
       child: Text('Container Widget'),
       color: Colors.blue,
       padding: EdgeInsets.all(20.0),
    );
    Container Padding

    Margin

    Use the margin property to add empty space that surrounds the widget.

    Container(
       child: Text('Container Widget'),
       color: Colors.blue,
       padding: EdgeInsets.all(20.0),
       margin: EdgeInsets.all(20.0),
    );

    Lets remove the Center widget that wrapped the container widget so that you can get a better idea of the container’s margin property.

    Center Widget Removed
    Container Margin

    Decoration

    Use the decoration property to add a shape to your container like a circle.

    Container(
       child: Text('Container Widget'),
       decoration: BoxDecoration(
          shape: BoxShape.circle,
          color: Colors.blue,
       ),
       padding: EdgeInsets.all(50.0),
       margin: EdgeInsets.all(25.0),
    );

    The decoration is by default sized to the container’s child. In this case, the container fits the circle decoration to the narrowest parameter, the text widget’s height. You can style the decoration with margin and padding, just like before.

    Container Shape

    Alignment, Width & Height

    Use the alignment property to align the child within the container (The text within the text box in this case). Once you set alignment, the container will expand to fill its parent’s width and height. You can override this by setting the container’s width and height properties.

    Container(
       child: Text('Container Widget'),
       color: Colors.blue,
       alignment: Alignment.center,
       width: 200,
       height: 100,
    );
    Container Alignment, Width & Height

    Transform

    The transform applies a slight rotation to the entire contraption to complete the effect. Let us rotate our container to add more flavor to this design.

    Container(
       child: Text('Container Widget'),
       color: Colors.blue,
       width: 200.0,
       height: 200.0,
       transform: Matrix4.rotationZ(0.05),
    );
    Container Transform

    Let us use some more properties to decorate our container widget.

    import 'package:flutter/material.dart';
    
    void main() => runApp(const HomePage());
    
    class HomePage extends StatelessWidget {
      const HomePage({super.key});
    
      @override
      Widget build(BuildContext context) {
        return MaterialApp(
          title: "Material App Title",
          home: Scaffold(
            appBar: AppBar(
              title: const Text("Awesome App Title"),
            ),
            body: Center(
              child: Container(
                padding: const EdgeInsets.all(8),
                alignment: Alignment.center,
                width: 150,
                height: 100,
                transform: Matrix4.rotationZ(0.05),
                decoration: BoxDecoration(
                    //shape: BoxShape.circle,
                    borderRadius: BorderRadius.circular(10),
                    boxShadow: const [
                      BoxShadow(
                          color: Colors.blueGrey,
                          blurRadius: 5,
                          offset: Offset(2.0, 5.0)),
                    ],
                    color: Colors.teal,
                    gradient:
                        const LinearGradient(colors: [Colors.yellow, Colors.pink])),
                child: const Text(
                  "Container Widget",
                  textAlign: TextAlign.center,
                  style: TextStyle(
                    color: Colors.white,
                    fontWeight: FontWeight.bold,
                    fontSize: 20,
                  ),
                ),
              ),
            ),
          ),
        );
      } //build
    } //HomePage
    Container Final App
  • Flutter Add Image

    Flutter is an open source framework by Google for building beautiful, natively compiled, multi-platform applications from a single code base. Flutter allows you to build apps for mobile, web, dekstop, and embedded devices – all from a single codebase.

    Referring to the official documentation we can easily add image in a flutter app using the following syntax. 

    Image.asset('image_name')

    Steps – Flutter Add Image

    1. Create a new folder in the root of your flutter proejct. We’ll create assets folder and then will create images folder. In this way, we can later create other folders like fonts in our assets folder.
    Flutter Create Assets/Images Folder
    1.  Copy your desired image in the newly created images folder.
    2. pubspec.yaml is an important file located at the root of the project which is  used to identify the assets used in an app. We have to manipulate this file to use images in a flutter app.
      # To add assets to your application, add an assets section, like this:
       assets:
         - assets/images/flutter.png

    Note: Please take care of indentation.

    • [2 white spaces before assets:]
    • [4 white spaces before – assets/images/flutter.png]

    Also, If you want to use more than one image then don’t write image name after folder name.

    1. Insert flutter add image code in your app.
    Image.asset("assets/images/flutter.png"),

    Code

    import 'package:flutter/material.dart';
    
    void main() => runApp(
          MaterialApp(
            home: Scaffold(
              appBar: AppBar(title: const Text("Flutter Add Image")),
              body: Center(
                child: Image.asset("assets/images/flutter.png"),
              ),
            ),
          ),
        );

    Output

    Output Flutter Add Image

    Add Image from Internet

    To add image from the internet or network we need to use Image.network instead of Image.asset and pass the image URL in the parameter. (Official Documentation)

    Image.network("https://picsum.photos/250?image=9"),

    Happy coding!

  • Flutter Dark Theme

    Continuing the previous blog post which explained flutter Scaffold() and AppBar() widgets. We had used home argument of MaterialApp() widget and the value of this argument was a Scaffold() Widget. Scaffold() Widget had appBar arugment that accepts AppBar() constructor, the consturctor accepts title argument with the value of Text() widget and body argument with a value of Text() widget.

    In this post we’ll learn how to use or enable flutter dark theme in an application. Previously, we learned MaterialApp() Widget using only one parameter i.e, home

    We’ll use a second parameter named theme that accepts ThemeData() constructor. Consider the following code.

    import 'package:flutter/material.dart';
    
    void main() => runApp(
          MaterialApp(
            theme: ThemeData(brightness: Brightness.dark),
            home: Scaffold(
              appBar: AppBar(
                title: const Text("Flutter Dark Theme"),
              ),
              body: const Text("Flutter Dark Theme"),
            ),
          ),
        );
    

    We have used only one argument in ThemeData() i.e, brightness to convert app in to dark theme.


    MaterialApp(
            theme: ThemeData(brightness: Brightness.dark),

    Have a look at the complete code now.

    import 'package:flutter/material.dart';
    
    void main() => runApp(
          MaterialApp(
            theme: ThemeData(brightness: Brightness.dark),
            home: Scaffold(
              appBar: AppBar(
                title: const Text("Flutter Dark Theme"),
              ),
              body: const Text("Flutter Dark Theme"),
            ),
          ),
        );
    

    Output

    Flutter Dark Theme

    This was the simplest possible single-line code to use flutter dark theme. We’ll explore more parameters in the later lessons.

  • Flutter Scaffold and AppBar Widgets

    Flutter Scaffold and AppBar Widgets help in the beautification of our App and display some string in the app bar. Consider the following flutter code.

    import 'package:flutter/material.dart';
    
    void main() => runApp(
          const MaterialApp(
            home: Text("Flutter Scaffold & AppBar Widgets"),
          ),
        );

    Here we have used MaterialApp() widget and are using home parameter of the MaterialApp() widget. In the home parameter, we are using a Text widget that displays some text.

    Output

    Basic Material App

    The above output is not clean. We need to use MaterialDesign() in order to make our app fancy. Remember everything in Flutter is a widget?
    MaterialApp() is a widget that wraps various widgets usually required for material design applications.
    Resource: https://api.flutter.dev/flutter/material/MaterialApp-class.html

    Let’s rewrite the above flutter code. Use Scaffold() widget that accepts various parameters.

    1. AppBar: accepts an AppBar() constructor and provide title paramater with a value of Text() widget.with body parameter and use the Text Widget in body parameter.
    2. body: accepts a Text() widget.
    import 'package:flutter/material.dart';
    
    void main() => runApp(
           MaterialApp(
            home: Scaffold(
              appBar: AppBar(
                title: const Text("Flutter Scaffold and AppBar"),
              ),
              body: const Text("Flutter Scaffold & AppBar Widgets"),
            ),
          ),
        );
    

    Output

    Flutter Scaffold and AppBar Widgets

    The output looks so clean now with an elegant AppBar and some text in the body.

  • Minimal Flutter App

    Minimal Flutter app is the simplest possible app that calls the runApp( ) function with a widget.

    import 'package:flutter/material.dart';
    
    void main() {
      runApp(
        const Center(
          child: Text(
            "Minimal Flutter App.",
            textDirection: TextDirection.ltr,
          ),
        ),
      );
    }
    

    In the main function, we are calling runApp( ) function where we are passing two widgets directly irrespective of Stateless or Stateful behavior. We have wrapped the Text( ) widget in Center Widget. In other words, the Center( ) widget has only one child that is a Text( ) widget. This widget takes up the whole screen and we need to provide the text direction as we are not using MaterialApp() widget at the moment.
    Tip: Remember everything in Flutter is a widget.

    Output

    Minimal Flutter App – Output
  • Flutter Maps

    We need to improve the functionality of our app. Currently we have a list of just two questions and no answer is associated with the question.

    var questions = [
          'What\'s your favorite color?',
          'What\'s your favorite animal?'
        ];

    The question should also have the information about available answers. We need more complex object which can group multiple pieces of information together. 

    We could create a new class which has all these features we need and use that class to create objects and that is perfectly fine. However, we’ll use a different data structure that’s built in to Dart and that is a map

    map is a collection of key value pairs. Lets create a map where we have three questions and four answers for each question as below,

    var questions = [
          {
            'questionText': 'What\'s your favorite color?',
            'answers': [ 'Black', 'Red', 'Green', 'White'],
          },
          {
            'questionText': 'What\'s your favorite animal?',
            'answers': [ 'Leopard', 'Markhor', 'Deer', 'Rabbit'],
          },
          {
            'questionText': 'What\'s your favorite lake?',
            'answers': [ 'Saif-ul-Malook', 'Doodi pat sar', 'Katora', 'Saral'],
          },
        ];

    Here is our main.dart file where we are going to map lists to widgets.

    //File Name: main.dart
    import 'package:flutter/material.dart';
    
    /* ./ means look in the main folder where main.dart resides and then the
    *  name of the file which you wana import
     */
    
    import './question.dart';
    import './answer.dart';
    
    /*
    * The arrow function allows us to create a simplified function consisting of a single expression.
    * We can omit the curly brackets and the return keyword
    */
    
    void main() => runApp(MyApp());
    
    class MyApp extends StatefulWidget {
      /*
       * createState() is a method that takes no arguments but returns a State object
       * which is connected to a StatefulWidget
       */
      @override
      State<StatefulWidget> createState() {
        return _MyAppState();
      } //createState()
    } //StatefulWidget
    
    /* A leading underscore makes the property private, here leading underscore will turn
     * this public class in to private class. Now MyAppState class can only be used in
     * main.dart file, in our case in MyApp class.
     */
    class _MyAppState extends State<MyApp> {
      var _questionIndex = 0;
    
      void _answerQuestion() {
        setState(() {
          _questionIndex++;
        });
        print(_questionIndex);
      }
    
      @override
      Widget build(BuildContext context) {
        var questions = [
          {
            'questionText': 'What\'s your favorite color?',
            'answers': ['Black', 'Red', 'Green', 'White'],
          },
          {
            'questionText': 'What\'s your favorite animal?',
            'answers': ['Leopard', 'Markhor', 'Deer', 'Rabbit'],
          },
          {
            'questionText': 'What\'s your favorite lake?',
            'answers': ['Saif-ul-Malook', 'Doodi pat sar', 'Katora', 'Saral'],
          },
        ];
        return MaterialApp(
          /*
          * A Scaffold Widget provides a framework which implements the basic material design visual
          * layout structure of the flutter app.
           */
          home: Scaffold(
            appBar: AppBar(
              title: Text('First Flutter App'),
            ),
            body: Column(
              children: <Widget>[
                Question(
                  questions[_questionIndex]['questionText'],
                ),
                /*
                * for answers, transform list of maps in to list of widgets
                * map() method executes a function (anonymous) which we have to pass as an argument.
                * it returns a widget
                * ... is spread operator, it takes a list and pulls all the values in the list out of it
                * and add them to surrounding list as individual value. Means, we don't add a list to a list
                * but values of the list to a list.
                 */
                ...(questions[_questionIndex]['answers'] as List<String>)
                    .map((answer) {
                  return Answer(_answerQuestion, answer);
                }).toList(),
              ],
            ),
          ),
        );
      } //build()
    } //MyApp()
    

    Here is answer.dart file

    //FileName: answer.dart
    import 'package:flutter/material.dart';
    
    class Answer extends StatelessWidget {
      final Function selectHandler;
      final String answerText;
    
      Answer(this.selectHandler, this.answerText);
    
      @override
      Widget build(BuildContext context) {
        return Container(
          width: double.infinity, ////double.infinity means occupy the whole screen (width in this case)
          margin: EdgeInsets.all(10), //apply margin of 10 pts to all 4 sides
          /*
          * We have provided 3 named arguments here to ElevatedButton()
          * 1. child: which is a Text() widget
          * 2. onPressed: which is a function we get via constructor
          * 3. style: where we change the color, padding and text style
           */
          child: ElevatedButton(
            child: Text(answerText),
            //onPressed takes a function
            onPressed: selectHandler,
            style: ElevatedButton.styleFrom(
              primary: Colors.blue, //the button's background color
              onPrimary: Colors.white, //the button's text color
    
              padding: EdgeInsets.symmetric(horizontal: 50, vertical: 20),
              textStyle: TextStyle(fontSize: 30, fontWeight: FontWeight.bold),
            ), //.styleFrom
          ), //ElevatedButton
        ); //Container
      }
    }
    

    The question widget will remain unchanged.

    //FileName: question.dart
    import 'package:flutter/material.dart';
    
    class Question extends StatelessWidget {
      /*
      * final keywords tells dart that this value will never change after its
      * initialization here int he constructor
       */
      final String questionText;
    
      /* Lets have a constructor to initialize this widget class questionText
      *  Now the first positional argument passed to this constructor will be stored in
      *  questionText variable
       */
      Question(this.questionText);
    
      @override
      Widget build(BuildContext context) {
        return Container(
          width: double.infinity, //double.infinity means occupy the whole screen (width in this case)
          margin: EdgeInsets.all(10), //apply margin of 10 pts to all 4 sides
          child: Text(
            questionText,
            style: TextStyle(fontSize: 26),
            textAlign: TextAlign.center,
          ), //Text
        ); //Container()
      } //build
    } //Question
    

    Here is the output

    Output – Mapping Lists to Widgets

    Happy Coding!

  • Flutter Private Properties

    Unlike Java, Dart doesn’t have the keywords public, protected, and private. If an identifier starts with an underscore _, it’s private to its library. Libraries not only provide APIs, but are a unit of privacy: identifiers that start with an underscore _ are visible only inside the library.

    Every Dart app is a library, even if it doesn’t use a library directive. The import and library directives can help you create a modular and shareable code base.

    //File Name: main.dart
    import 'package:flutter/material.dart';
    
    /*
    * The arrow function allows us to create a simplified function consisting of a single expression.
    * We can omit the curly brackets and the return keyword
    */
    
    void main() => runApp(MyApp());
    
    class MyApp extends StatefulWidget {
      /*
       * createState() is a method that takes no arguments but returns a State object
       * which is connected to a StatefulWidget
       */
      @override
      State<StatefulWidget> createState() {
        return _MyAppState();
      } //createState()
    } //StatefulWidget
    
    /* A leading underscore makes the property private, here leading underscore will turn
     * this public class in to private class. Now MyAppState class can only be used in
     * main.dart file, in our case in MyApp class.
     */
    class _MyAppState extends State<MyApp>{
      var _questionIndex = 0;
    
      void _answerQuestion() {
        setState( () {
          _questionIndex++;
        } );
        print(_questionIndex);
      }
    
      @override
      Widget build(BuildContext context) {
        var questions = [
          'What\'s your favorite color?',
          'What\'s your favorite animal?'
        ];
        return MaterialApp(
          /*
          * A Scaffold Widget provides a framework which implements the basic material design visual
          * layout structure of the flutter app.
           */
          home: Scaffold(
            appBar: AppBar(
              title: Text('First Flutter App'),
            ),
            body: Column(
              children: <Widget>[
                Text(questions[_questionIndex]),
                ElevatedButton(
                  child: Text('Answer1'),
                  //onPressed takes a function
                  onPressed: _answerQuestion,
                ),
                ElevatedButton(
                  child: Text('Answer2'),
                  onPressed: () => print('Answer2 chosen!'),
                ),
                ElevatedButton(
                  child: Text('Answer3'),
                  onPressed: () {
                    //...multiline function body
                    print('Answer3 chosen');
                  },
                ),
              ],
            ),
          ),
        );
      } //build()
    } //MyApp()
    

    Output

    Output

    Happy Coding!

  • Dart Named Arguments

    There are two types of arguments for a constructor in dart.

    1. Positional arguments – These are commonly used. For Positional arguments you have to remember which argument goes in to which place.
    2. Named arguments – This is a new concept if you belong to C++, Java or PHP. For Named Arguments you don’t need to remember the place/position of the argument. Named Arguments are optional but can be made mandatory using @required
    class Person{
    
      String name="";
      int age=0;
      
      Person({String inputName="", int inputAge=0}){
    
        this.name = inputName;
        this.age = inputAge;
      }//Person()
      
      Person.veryOld(this.name){
        age = 60;
      }//Person.veryOld()
    }//Person
    
    
    void main() {
    
      var p1 = Person(inputName: "Rizwan", inputAge: 34);
      var p2 = Person(inputName: "Ali", inputAge: 32);
      var p3 = Person.veryOld("Usama");
    
      print(p1.name); //Rizwan
      print(p1.age);  //34
    
      print(p2.name); //Ali
      print(p2.age);  //32
    
      print(p3.name); //Usama
      print(p3.age);  //60
      
    }
    
  • Dart Constructor

    class Person {
    
      String name="";
      int age=0;
      
      Person(String inputName, int inputAge){
        this.name = inputName;
        this.age = inputAge;
      }//Person()
    }//Person
    
    void main() {
    
      var p1 = Person("Rizwan", 34);
      var p2 = Person("Ali", 32);
      
      print(p1.name); //Rizwan
      print(p1.age);  //34
      
      print(p2.name); //Ali
      print(p2.age);  //32
    }
    

    In this constructor we are using positional arguments i.e, inputName and inputAge instead of named arguments.

  • First Flutter Widget

    What is Flutter?

    Flutter is Google’s UI toolkit for building beautiful, natively compiled applications for mobile, web, desktop, and embedded devices from a single codebase.

    I assume that you have successfully installed flutter either with Android Studio IDE or VS Code and have successfully configured an emulator.

    If you want to install flutter, kindly follow this official documentation.

    https://flutter.dev/docs/get-started/install

    //File Name: main.dart
    //Flutter first Hello World! Widget
    import 'package:flutter/material.dart';
    
    void main() {
    
       runApp(MyApp());
    }
    
    class MyApp extends StatelessWidget {
    
       @override
       Widget build(BuildContext context){
    
          return MaterialApp(home: Text('Hello World!');
    
       }//build
    }//MyApp
    1. Import Flutter package
    2. declare main function and run app i.e, runApp(MyApp)
    3. MyApp is a custom class that inherits from Stateless Widget(Later we’ll also look into StatfullWidget)
    4. MyApp class overrides build() method.
    5. build method returns a Widget and takes Build context as a parameter.
    6. MaterialApp() is a special widget that we should return. It does some base setup to turn combinational widgets into real app. The MaterialApp() takes a lot of named arguments, home is one of the named arguments where we use a text widget Text(‘Hello World!’).

    Output: The output involves no UI and is a simple Hello World!

    First Flutter Plugin – Output

    I hope the logic and code behind the first flutter widget make sense.

    Happy coding!